Create beautiful animations with AngularJS and CSS whenever a model updates. Works with increment or decrement if the model is a number.

The post was written by Dan Mindru, the maker of Shipixen—the best Next.js boilerplate.
Welcome back Angular people! With today’s article I’ll cover a neat way to enhance your interactions when a model changes.
As Angular 2 is getting ready for prime-time (beta is out!), I thought there’s just enough time to squeeze in one more article on Angular 1.x. Here’s what you can expect to get out of this one:
Grab it from github, see a quick demo here or add it as a dependency to your app using
bower install ng-animate-model-change --save.
Intro
Animating certain elements when a model changes sounds like a very common Angular use case. A quick Google search will reveal many SO questions about it, but most rely on the $animate service to accomplish the task. While I think that is perfectly fine, I wouldn’t want to add it as a dependency just for this situation.
Building the basic directive
First, the markup. We need to pass in a model available in scope and we’re ready to go:
<span animate-model-change model="{{someModel}}">{{someModel}}</span>
I like to keep the directive name and attribute parameters separated, but we could have passed the model as animate-model-change="{{someModel}}" to keep it even more simple.
Let’s jump to the JavaScript part now. The first thing we need to do is figure out when the model has been incremented/decremented and what class to add for each of the cases.
angular
    .module("dm.animateModelChange", [])
    .directive("animateModelChange", animateModelChangeDirective);

function animateModelChangeDirective($timeout) {
    function animateModelChangeLink(scope, element, attrs) {
        //Define classes for each of the cases.
        var incrementClass = "up",
            decrementClass = "down";

        function modelChanged(newVal, oldVal) {
            var changeClass = null;

            // We need to make sure the model can be parsed as a number.
            if (
                newVal &&
                newVal !== oldVal &&
                angular.isNumber(Number(newVal)) &&
                !isNaN(Number(newVal))
            ) {
                if (Number(newVal) < Number(oldVal)) {
                    changeClass = decrementClass;
                } else {
                    changeClass = incrementClass;
                }
            }

            //Finally, add the 'computed' class to the element.
            element.addClass(changeClass);
        }

        //Watch for model changes.
        scope.$watch(function () {
            return attrs.model;
        }, modelChanged);
    }

    return {
        restrict: "A",
        link: animateModelChangeLink,
    };
}
Now that this is out of the way, we need to also remove the added class after a certain period of time. For that we can use Angular’s $timeout service.
/* ... */
function animateModelChangeLink(scope, element, attrs) {
    var timer = null,
        incrementClass = "up",
        decrementClass = "down";

    /* ... */

    function modelChanged(newVal, oldVal) {
        // Whenever the model changes, clear previous timeout (for fast clicking).
        if (timer) {
            $timeout.cancel(timer);
            timer = null;
        }

        /* ... */

        //After each model change, define a timer that will remove the applied class.
        timer = $timeout(function removeClasses() {
            //Remove both increment & decrement classes (for fast clicking).
            element.removeClass(incrementClass);
            element.removeClass(decrementClass);
        }, 300);
    }

    scope.$watch(function () {
        return attrs.model;
    }, modelChanged);
}
/* ... */
Finally, some CSS is needed to animate the target element. Color is good enough for this demo:
/* Add 'transition' to all elements with the directive attribute. */
[animate-model-change] {
    transition: 0.3s color ease;
}

.up {
    color: green;
}

.down {
    color: red;
}
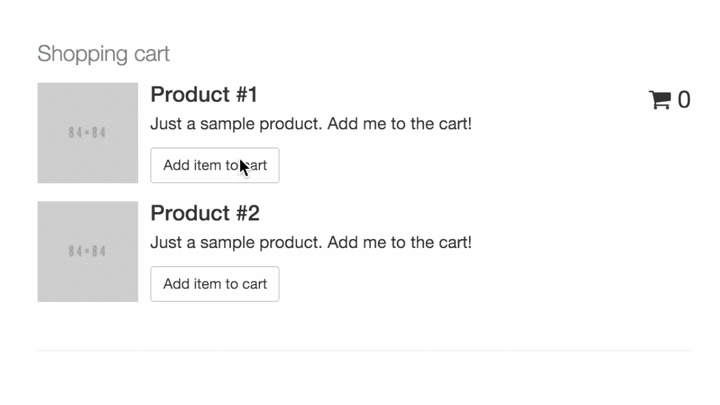
Check out this bin to see the result so far.
That’s about it for a very basic model change animation. One major disadvantage with this approach is that we have a pesky timeout to deal with in the directive’s source code, which means we need to change values in 2 places every time we want to update the animation time.
To solve this, we could read the transition-duration property on the target element. Another solution is to pass a timeout as an attribute. In fact we can do both, but reading the transition-duration is probably a nice-to-have, not necessarily a must.
Again, the code so far should work fine for a lot of cases, but ideally we should also be able to:
- Configure class names
- Use the current element’s class (if provided) to generate class names
- Handle non-number values
- Configure timeout
- Default the timeout to the element’s transition-duration if set
I’ll cover this in the next sections, because the directive is not really reusable at this point.
Taking it a step further
1. Configure class names
Reusability is one of the main reasons directives are so powerful. With just a small change we can dramatically increase the reusability of this directive. For custom class names to work, we need to add two new attributes to our markup:
<span animate-model-change
      model="{{someModel}}"
      increment-
      decrement->
  {{someModel}}
</span>
…and read those values in the link function.
/* ... */
function animateModelChangeLink(scope, element, attrs) {
    var timer = null,
        incrementClass = attrs.incrementClass || "up",
        decrementClass = attrs.decrementClass || "down";

    /* ... */
}

/* ... */
2. Use the current element’s class (if provided) to generate class names
As with number 5, this is just some sugar on top. Because it’s super easy to implement, I will go ahead with it. I am a big fan of BEM, and I won’t need completely custom classes. Instead, I would like to provide a ‘block class’ (like a base class - let’s say foo) and create modifiers from it for decrement / increment as follows: foo--decrement / foo--increment. Of course, any other style convention can be applied instead. To implement BEM-style classes we need to read the current class and append suffixes to it:
/* ... */
function animateModelChangeLink(scope, element, attrs) {
    var timer = null,
        currentClass = parseClassName(element.attr("class")) || "model",
        incrementClass = attrs.incrementClass || currentClass + "--increment",
        decrementClass = attrs.decrementClass || currentClass + "--decrement";

    function parseClassName(className) {
        // Don't read the ng-* class names on the element.
        var classComps = className.split(" ").filter(function (item) {
            if (!(item.indexOf("ng-") > -1)) {
                return item;
            }
        });

        return classComps[classComps.length - 1];
    }

    /* ... */
}

/* ... */
Note that the parseClassName method only takes the last provided class (bar will be used for ****). That works in most cases, but some might want to go for another custom attribute to have complete control over what class is applied.
3. Handle non-number values
Things can go wrong and a model might not be a number all the time, but those cases are fairly easy to handle. To be consistent, another custom attribute should be added: non-number-class. The only thing we need to do to make it work is to default to this class when a change is detected. Here’s the HTML:
<span animate-model-change
      model="{{someModel}}"
      ...
      non-number->
  {{someModel}}
</span>
…and the JavaScript:
/* ... */
function animateModelChangeLink(scope, element, attrs) {
    var timer = null,
        currentClass = parseClassName(element.attr("class")) || "model",
        /* ... */
        nonNumberClass = attrs.nonNumberClass || currentClass + "--non-number";

    function modelChanged(newVal, oldVal) {
        if (newVal !== oldVal) {
            // The non-number class will be the default value.
            var changeClass = nonNumberClass;

            /* ... */
        }
    }

    scope.$watch(function () {
        return attrs.model;
    }, modelChanged);
}

/* ... */
4. Configure timeout
Configuring the class removal timeout is another way to increase the directive reusability. Again, a fairly simple implementation will bring a considerable amount of flexibility. We need an attribute:
<span animate-model-change
      model="{{someModel}}"
      ...
      timeout="500">
  {{someModel}}
</span>
…and some JavaScript to read it and replace it in the timer logic:
/* ... */
function animateModelChangeLink(scope, element, attrs) {
    var timer = null,
        /* ... */
        timeout = attrs.timeout || 300; // Default to 300ms

    function modelChanged(newVal, oldVal) {
        if (newVal !== oldVal) {
            var changeClass = nonNumberClass;

            /* ... */

            timer = $timeout(function removeCartNumber() {
                /* ... */
            }, Number(timeout));
        }
    }

    scope.$watch(function () {
        return attrs.model;
    }, modelChanged);
}

/* ... */
5. Default the timeout to the element’s transition-duration if set
Reading the element’s transition-duration might make this directive look a bit like ‘black magic’ and it’s surely a non-essential part. However, this allows us to stay away from JS/HTML and define the animation time via CSS.
Vendor prefixes are going to be a pain in the JavaScript this time, but the rest is not rocket science. Because transition-duration can be set in milliseconds (ms) and seconds (s), we also need to parse that value. Lastly, we have to rely on the getComputedStyle method to get the latest properties.
Here’s how it looks:
function getTransitionDuration(element, normalize) {
    var prefixes = " webkit moz ms o khtml".split(" "),
        result = 0,
        computedStyle = getComputedStyle(element),
        duration,
        delay,
        prefix;

    for (var i = 0; i < prefixes.length; i++) {
        prefix = prefixes[i] + "-";

        if (prefixes[i] === "") {
            prefix = "";
        }

        duration = computedStyle[normalize(prefix + "transition-duration")];

        if (duration) {
            duration =
                duration.indexOf("ms") > -1
                    ? parseFloat(duration)
                    : parseFloat(duration) * 1000;

            result = duration;
            break;
        }
    }

    return result;
}
By the way, it’s a good idea to also check for a transition-delay and increment the duration with it’s value:
function getTransitionDuration(element, normalize){
  ...
    if(duration){
      // Check if there's a delay.
      delay = computedStyle[normalize(prefix + 'transition-delay' )];

      if(delay){
        duration += (delay.indexOf('ms') >- 1) ? parseFloat(delay) : parseFloat(delay) * 1000;
      }
    ...
    }
  ...
}
Now that we can figure out the transition duration, a one-liner is enough to plug it into our directive:
/* ... */
function animateModelChangeLink(scope, element, attrs) {
    var timer = null,
        /* ... */
        timeout =
            attrs.timeout ||
            getTransitionDuration(element[0], attrs.$normalize) ||
            300;

    /* ... */
}

/* ... */
There’s a small trick here, which I believe makes the code a bit more readable. I’m using attrs.$normalize to convert the CSS property into a so-called ’normalized’ value, which is essentially making it camelCase. This way we don’t need to convert the prefixes or the CSS beforehand, we can just write them naturally.
It seems like a good time to wrap up the article here, make sure to check out the final code on github together with some usage examples / demo.
If you liked the post, you might like Shipixen—a Next.js boilerplate that allows you to ship a beautifully designed Blog, Landing Page, SaaS, Waitlist or anything in between. Today!